一句话摘要
3 个月研究 AI 网红赚 3.9 万
我花了 3 个月摸透 AI 网红玩法,带走 39,000 美元和整套完整攻略 2026年5月8日 · 13分钟阅读 · 查看原文 ↗ AI Marketing Onlyfans Instagram
AI 网红市场规模已突破 60 亿美元。品牌方正在给 AI 模特每条帖子支付 1,000 到 10,000 美元。有一个 AI 模特 5 天涨了 1,000 个 Instagram 粉丝。另一个每月净赚 11,000 美元,不用睡觉、不会倦怠、也从来没有状态糟糕的一周。
打造一个 AI 网红已经没有门槛了。不需要相机、不需要团队、不需要预算。一台笔记本电脑、几个合适的工具,再加上愿意发布那些大多数人会划走、却悄悄占领他们信息流的内容的决心。
这是这份打法的精简版,从零开始,直到打造出一个能在多个平台上变现的 AI 模特。
第 1 步 - 创建这张脸
这张脸是根基。其他一切成败都取决于:两个月后,你的生成结果是否还是同一个模特的模样。
从 Pinterest 找两张参考脸。不是一张,也不是三张,就是两张。而且要有意让它们形成反差。
> 脸 #1 定下这个细分领域的调性:高颧骨、冷峻的神情、硬朗的下颌线
> 脸 #2 是“供体”,婴儿脸、丰满的嘴唇、发色、瞳色
大多数新开的 AI 账号看起来像复制粘贴的,就是因为他们只用了单张参考。模型会取平均值,于是你得到一张谁都无法归入某个细分领域的脸。
打开 wavespeed,加载 nano banana pro
上传两张照片,运行融合提示词,生成 5 到 10 个变体,直到其中一张感觉真实、而不是千篇一律。再加上一个谁都说不清道不明的独特细节——一颗小痣、一道淡淡的疤痕、一只眼睛颜色不对称。这个细节对可信度的提升,比你生成的任何姿势或穿搭都大。
挑选眼睛和骨相清晰可见的脸,比这两张输入照片本身漂不漂亮更重要。光线干扰会让你浪费一周时间,生成一堆废图。
提示词:


第 2 步 - 创建数据集
> 数据集就是你的原材料——一堆干净的照片,你喂给 AI 用来训练 LoRA
> LoRA 是训练出来的模型,它能永久记住你的 AI 模特的特征,并在任何环境下重现这些特征
整个玩法的黄金法则:完美的数据集 = 完美的 LoRA。垃圾进,垃圾出。
流程如下:
首先,你要打造基础身份:可以用提示词从零生成、像第 1 步那样融合两张参考脸,或者找到某种独特的东西。你从第 1 步真正需要得到的,是一张干净的 4K 模特头像照。那就是“锚点”。数据集里的每一张图都要换脸,以匹配这一张图。
但你也不能盲目地换掉所有东西
数据集应该包含什么内容,有一套严格的黄金比例
> 70% 特写镜头:脸部、直接而锐利的眼神接触,外加几张头部微微转动的。这才是教会 LoRA 记住你模特身份的内容
> 20% 全身照:从头到脚,姿势多变,环境多变
> 10% 细节镜头:背部、配饰、眼镜、特定角度、手部、首饰,以及任何在你的内容中反复出现的东西
哪些内容不该出现在数据集里
> 模特坐在离相机 30 英尺远的桌子旁、看不清脸也看不清身体的照片
> 遮挡特征的厚重滤镜

> 运动模糊、低光照,以及任何让 LoRA 只能靠猜来填补内容的东西
如果参考照片是烂的,训练图就是烂的。你没法在后期补救。
给打算运营不止一个 AI 模特的人的专业建议
提前准备一套干净的“无脸”数据集。相同的构图、相同的比例、相同的镜头,不把任何一张脸固化进去。之后每推出一个新模特,你只需把新身份换脸到这套数据集上,再训练 LoRA 即可。每个模特能省下几十个小时,还能让你整个“模特矩阵”的视觉质量保持一致。
到底怎么操作
两条路线
> 基于参考:从 Pinterest 挑选你喜欢的全身照和细节镜头,让 Claude 或 Grok 把每一张都描述成详细的提示词,然后把提示词 + 第 1 步的 4K 脸 + 参考图一起丢进 Wavespeed 上的 Wan 2.7,用你模特的身份生成对应的镜头
> 在 RunPod 上跑换脸工作流:更快、更可控、配置更复杂,我在 TG 里单独讲过
[https://wavespeed.ai/?ref=0xkiyoro](https://wavespeed.ai/?ref=0xkiyoro)
目标是最终得到 30 到 90 张图、覆盖 70/20/10 比例的数据集。这足以训练出一个干净的 LoRA,让它在接下来的 1,000 条帖子里都不会漂移。
如果你只需要静态图片、暂时不训练 LoRA,那么 10 到 15 张覆盖全部三个类别的图片,是让模特在短视频内容中保持一致的最低要求。
提示词
第 3 步 - 训练 LoRA(可选)
如果你只做静态图片,可以跳过这一步。如果你打算规模化地做视频,就训练一个。


LoRA 能让你的模特身份在每一次生成中都保持一致。同样的身材比例、同一张脸、同样的细节,每次都一模一样。没有它,发 50 到 100 条帖子之后就会出现漂移,订阅者会察觉出来。
要求:
> 30 到 90 张图片,即第 2 步的数据集加上更多变体
> 每张图片配一个说明文件,描述图片内容
> 全部打包压缩成一个归档文件
在 Wavespeed 上用 Z-image 训练,跑 3,000 步,成本大约 3 美元。这不是笔误。两年前还需要租 A100、搭一套 Python 流水线才能完成的训练,现在只是一个 3 美元的按钮。
第 4 步 - 生成视频
视频才是杠杆。触达来自视频,触达转化为粉丝,粉丝转化为收入。
两条路线:
路线 A:Kling 3.0
> 上传一段参考视频,最好是体形和发型跟你角色相近的人的一段片段
> 生成一张首帧图,让你的角色锚定在那段参考视频的第 1 帧上
> 把两者都丢进 Kling,写一条紧凑的运动控制提示词,然后运行
> 大约 80% 的场景都能用,速度快,不需要任何基础设施


路线 B:ComfyUI 自定义工作流
> 在 runpod 或 vast.ai 上租一块 GPU
> 启动一个 Comfy 模板,加载你的工作流
> 把参考视频和首帧丢进去
> 在 RTX 5090 上每段视频约 15 到 20 分钟,在 RTX Pro 2000 上约 7 分钟
> 效果明显比 Kling 更紧凑,没有漂移,动作力学真实,但你需要这套工作流,也需要耐心
两条路线都可行。路线 A 适合起步,路线 B 才是能规模化放大的那条。
第 5 步 - 去除元数据
每一段 AI 视频都包含隐藏数据,会被标记为 AI 生成内容。Instagram、TikTok 和 Meta 现在已经在给这类视频降权了。如果你跳过这一步,还没等任何人看到这段视频,你就已经损失了一半的触达。
操作很简单:
> 把视频导入 CapCut
> 轻微裁剪边缘,这会移除嵌入在画面边框的元数据
> 加点颗粒,去掉那种“塑料感”的 AI 质感
> 略微提高亮度,去掉 AI 图像那种平淡的观感


> 提高锐度,找回细节
经过这一轮处理后,平台就会把视频当成普通的手机实拍。如果你在同一台设备上运营多个账号,还有更多细节讲究,但这一遍 CapCut 处理能解决 80% 的问题。
第 6 步 - 分发与转化漏斗
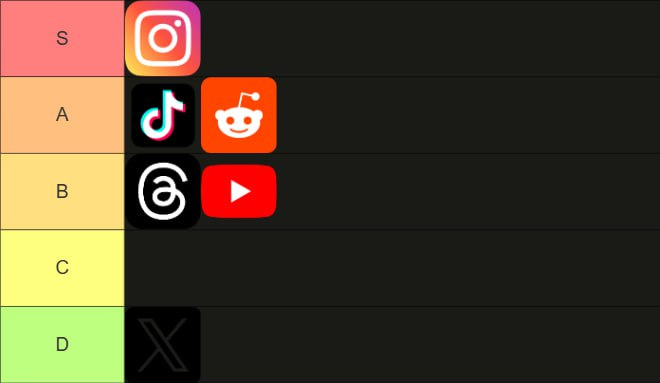
把内容发布到你所有能顾得过来的平台。TikTok、Instagram Reels、Reddit、X、Pinterest、Threads。每个平台奖励的内容各不相同,但模特始终是同一个。
一开始只发软性内容。前 500 到 1000 个粉丝期间,不要定价、不要放链接、不要变现。让算法先认定她是一个真人,然后再向她的受众索取任何东西。
一旦账号达到大约 1,000 个粉丝,就放一个简介链接。一个漏斗,一个目的地。2026 年真正能变现的平台是 Fanvue,而不是 OnlyFans。Fanvue 抽成 15%,而 OnlyFans 是 20%;它对 AI 模特更友好,注册流程的摩擦也更小。
像 link.me 这类 Linktree 风格的聚合链接工具很好用,把 fanvue 和你其他社交账号堆在同一个页面里指向它们
真正的钱在 fanvue 上。主页动态(wall feed)负责把人引进门,真正的收入来自打赏(tips)和付费解锁内容(PPV)。那是另一套单独的玩法。
整个漏斗,一句话概括
细分领域 → 脸融合(wavespeed 上的 nano banana)→ 数据集(wan 2.7)→ 可选 LoRA(z-image,3 美元)→ 视频(kling 或 comfy)→ 去除元数据(capcut + telegram 处理)→ ig + tiktok + reddit + x + pinterest + threads → fanvue
Aitana López 花了 18 个月才打造出来,因为当时一半的工具还不存在。Lil Miquela 需要一个摄影棚和数百万美元的制作投入。而 Maya——来自奥斯汀的那个 AI 模特——只靠 4 个 markdown 文件,就在头 30 天做出了 43,000 美元。
如今,上线一个现成的 AI 角色需要 3 周。但很快,只需要几天。
瓶颈早已不是算力或模型质量。真正的瓶颈是直觉:在人们自己还没意识到之前,就知道他们想关注什么样的角色。
附言:我会发布工作流、提示词、换脸流水线,以及那些我无法在这里公开的内容:[https://t.me/KiyoroAlpha](https://t.me/KiyoroAlpha)

## 提示词
```
👥 Swap
1👤[Face] +2👤[Face]
Integrate a face into an existing scene. Substitute the face in the reference image with the face from the donor image. The objective is a seamless merge: the new face must inherit the exact expression, pose, and lighting interaction from the reference, while its color attributes (hair and eyes) are adapted from the donor for a perfectly harmonious and natural result.
👥 Swap
1👤[Face] + 2📍[Body] + 3👤[Ref]
Generate a single, unique image. Use the facial structure, head shape, eye color, nose, mouth, and complexion/skin details of [Image 1]. Use the body type, proportions and physique of [Image 2]. Use the outfit, clothing style, pose, background and environment of [Image 3]. Ignore the face and body from Image 3 completely — use ONLY the face from Image 1 and body type from Image 2. The final result must be seamless, high quality, and look like one cohesive, realistic human being and scene.
👥 Mix
1👤[Face] + 2📍[Body] + 3👤[Ref your model] 4👤[Ref]
Generate a single, unique image. Use the facial structure, head shape, eye color, nose, mouth, and complexion/skin details of [Image 1]. Use the body type, proportions and physique of [Image 2]. Use the outfit and clothing style of [Image 3]. Use the pose, body positioning, background and environment of [Image 4]. Ignore the face and body type from Image 3 and Image 4 completely — use ONLY the face from Image 1 and body type from Image 2. The final result must be seamless, high quality, and look like one cohesive, realistic human being and scene.
👤 Clean (remove accessories)
1👤[Ref your model]
Remove all accessories and tattoos from the person in the image, including earrings, rings, necklaces, bracelets, piercings, tattoos, body art, and any other jewelry or accessories. The skin where tattoos were must be clean and natural. Keep everything else exactly the same — face, hair, outfit, background, lighting. The result must look natural and seamless.
```
```
Create a professional character reference sheet based strictly on the uploaded reference image. Use a clean, neutral plain background and present the sheet as a technical model turnaround while matching the exact visual style of the reference (same realism level, rendering approach, texture, color treatment, and overall aesthetic). Arrange the composition into two horizontal rows. Top row: four full-body standing views placed side-by-side in this order: front view, left profile view (facing left), right profile view (facing right), back view. Bottom row: three highly detailed close-up portraits aligned beneath the full-body row in this order: front portrait, left profile portrait (facing left), right profile portrait (facing right). Maintain perfect identity consistency across every panel. Keep the subject in a relaxed A-pose and with consistent scale and alignment between views, accurate anatomy, and clear silhouette; ensure even spacing and clean panel separation, with uniform framing and consistent head height across the full-body lineup and consistent facial scale across the portraits. Lighting should be consistent across all panels (same direction, intensity, and softness), with natural, controlled shadows that preserve detail without dramatic mood shifts. Output a crisp, print-ready reference sheet look, sharp details.
1) Front view (passport front view)
Use the uploaded girl's face as an exact identity reference. Create a photorealistic studio portrait in passport photo style: the girl is looking straight into the camera, neutral facial expression, closed mouth, both eyes clearly visible, soft even lighting with no harsh shadows, pure white background, head and upper shoulders visible, high skin detail, natural facial features, ultra realistic, centered composition, exact same identity, preserve facial proportions, same nose shape, same eyes, same lips, same jawline, no beautification, no face distortion.
2) 45° half-turn left
Use the uploaded girl's face as an exact identity reference. Create a photorealistic passport-style portrait on a pure white background. Turn the head 45 degrees to the left, eyes looking slightly toward the camera, neutral expression, soft studio lighting, no strong shadows, sharp and symmetrical facial details, natural skin texture, head and shoulders only, centered framing, exact same identity, preserve facial proportions, no face distortion.
3) 45° half-turn right
Use the uploaded girl's face as an exact identity reference. Generate a photorealistic passport-style portrait on a pure white background, head turned 45 degrees to the right, eyes looking slightly toward the camera, neutral facial expression, soft even studio lighting, high facial detail, realistic skin texture, centered composition, shoulders visible, exact same identity, preserve facial proportions, no face distortion.
4) Left profile 90°
Use the uploaded girl's face as an exact identity reference. Create a photorealistic biometric profile portrait with the head turned 90 degrees to the left, pure white background, soft even studio lighting, highly detailed facial contours, natural hair, sharp nose, lips, and jawline silhouette, passport photo style, exact same identity, preserve facial proportions, no face distortion.
5) Right profile 90°
Use the uploaded girl's face as an exact identity reference. Create a realistic biometric profile portrait with the head turned 90 degrees to the right, pure white background, soft studio lighting, neutral expression, sharp facial contour, realistic skin and hair texture, passport-photo style, high resolution, exact same identity, preserve facial proportions, no face distortion.
6) Full set of 5 angles at once
Use the uploaded girl's face as an exact identity reference. Create a set of 5 photorealistic passport-style portraits on a pure white background: front view, 45 degrees left, 45 degrees right, full left profile, full right profile. Keep identical lighting, camera distance, facial expression, hairstyle, and biometric facial accuracy across all images, exact same identity, preserve facial proportions, same nose shape, same eyes, same lips, same jawline, no beautification, no face distortion.
```
## 链接
- [wavespeed.ai/?ref=0xkiyoro](https://wavespeed.ai/?ref=0xkiyoro)
- [vast.ai](https://vast.ai)
- [link.me](https://link.me)
- [t.me/KiyoroAlpha](https://t.me/KiyoroAlpha)
- [cloud.vast.ai/?ref_id=460620](https://cloud.vast.ai/?ref_id=460620)
- [runpod.io?ref=xtnt7kj2](https://runpod.io?ref=xtnt7kj2)
标签:# X # AI # Marketing # Onlyfans # Instagram # Growth # Fanvue # Pinterest # Tiktok # Guide # Grok
相关文章
2026 年最聪明的赚钱动作:30 分钟打造她,每条爆款赚 1,500 美元。系统内附。 一张不存在的脸,能比真实的脸赚得更多。 AI Marketing Instagram Onlyfans
Fanvue + 四个文本文件 = 30 天 43,000 美元。这台机器是这样运转的 http://x.com/i/article/2063945770416398336 AI Onlyfans Marketing Instagram
如何用 Opus 5 在 10 秒内批量生成 100+ 爆款幻灯片 幻灯片是当前 TikTok 算法奖励最多的内容形式,却几乎没有人在规模化生产。 Marketing Tiktok Instagram AI
原文参考:https://maxed.wiki/posts/i-spent-3-months-figuring-out-ai-influencers-i-walked-out-with-39k-and-the-full-playbook/ (Maxed.wiki,本页为站内中文整理)